Click Trading with AutoTrader#
Although AutoTrader is a platform for automated trading systems, it can also be used to manually place orders over the command line. this can also provide a good means of interacting and becoming familiar with the Broker Interface.
Imports#
All you need to get started is AutoTrader and the Order object.
from autotrader import AutoTrader, Order
Paper Click Trading#
As a first example, lets look at papertrading, where we will use the virtual
broker to simulate trading on our exchange of choice. As usual, you must
configure the virtual trading account with the virtual_account_config method.
In the example below, we are simulating trading on
Binance throught the CCXT
integration. After creating a new instance of AutoTrader, configure it to
use ccxt:binance as the broker, then configure the virtual Binance account.
Here we are using 10x leverage.
Since we are mirroring the exchange locally, you do not need to provide any API keys to simulate trading.
Start-Up#
AutoTrader will go into manual mode whenever you call the run method without
having added a strategy via the add_strategy
method. Notice that at.run() will return the broker instance created.
at = AutoTrader()
at.configure(broker='ccxt:binance')
at.virtual_account_config(verbosity=1, exchange='ccxt:binance', leverage=10)
broker = at.run()
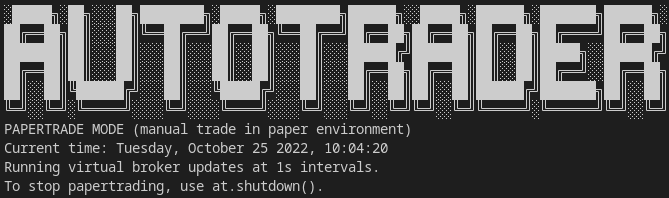
The following output will be produced. Here we can clearly see that we are manually trading in a paper trading environment. We can now interact directly with the broker instance returned.
Tip
While you are at it, why not spin up a dashboard to get a nice overview of your trading?
Realtime Updates#
You might also notice from the output above that the virtual broker is running, with updates at 1 second intervals. This means that the virtual broker will refresh all prices and orderbook snapshots every second.
To make this all possible, the virtual broker needs to have a constant data feed from the exchange it is mirroring. When launching AutoTrader in manual papertrade mode, a new thread is spawned to do this. This means that the broker instance(s) created will constantly be updating in the background to see if any of your orders should be filled, and to update the value of your positions.
Placing an Order#
Now lets look at placing an order. Start by creating the order using an
Order object, then submit it to the broker using the
place_order method.
# Create an order
order = Order(
    instrument="ETH/USDT",
    direction=1,
    size=0.1,
)

# Place order
broker.place_order(order)
After doing so, you will see something similar to the following output from the virtual broker.
2022-10-25 00:18:39.263975+00:00: Order 1 received: 0.1 unit ETH/USDT market buy order
2022-10-25 00:18:40.625583+00:00: Order 1 filled: 0.1 units of ETH/USDT @ 1342.12 (Buy)
A 0.1 unit long position in ETH is now being simulated, using the orderbook on Binance!
Interacting with the Broker#
Now that you have a position open, you can interact with the broker and test interacting with the unified methods. For example, to get your current positions:
>>> broker.get_positions()
{'ETH/USDT': Position in ETH/USDT}
To close the position, simply submit another order:
# Create a closing order
order = Order(
    instrument="ETH/USDT",
    direction=-1,
    size=0.1,
)

# Place order
broker.place_order(order)
Shut-Down#
When you are finished click trading, you should use the shutdown method to kill
the update threads and run the shutdown routines. After doing this, you will be
shown a summary of your trades taken during the trading period.
at.shutdown()
Live Click Trading#
Now that we are live trading, we will also need to specify our API keys in a
keys.yaml file.
Tip
You can use the command line interface to initialise the keys.yaml file.
Once you have done that, everything is basically the same as described above,
with the exception of the environment="live" argument.
So, to make things a bit more interesting, lets connect to two exchanges
at the same time: Bybit and dYdX.
at = AutoTrader()
at.configure(verbosity=1, broker='ccxt:bybit, dydx', environment="live")
brokers = at.run()
Now, the object returned by at.run() is a dictionary with each broker instance:
{'ccxt:bybit': AutoTrader-Bybit interface, 'dydx': AutoTrader-dYdX interface}
To access the broker instances directly, you can simply index them:
bitmex = brokers['ccxt:bitmex']
dydx = brokers['dydx']
Now, any orders you submit will go directly to the real exchanges.